posts may contain Amazon affiliate links, which earn me a small commission when you buy (but doesn't cost you anything extra). Occasionally I receive free products and/or run sponsored posts—this will always be stated clearly in the post. Thank you for supporting this blog.

This website contains some quotations, excerpts, and screen clips from copyrighted material. These uses fall well within the copyright doctrine of "Fair Use".
torta
Showing posts with label torta. Show all posts
Tuesday, May 5, 2015

Teleras (Flat Bread Rolls)

Tuesday, May 5, 2015

Teleras (Flat Bread Rolls)

Teleras (Flat Bread Rolls)
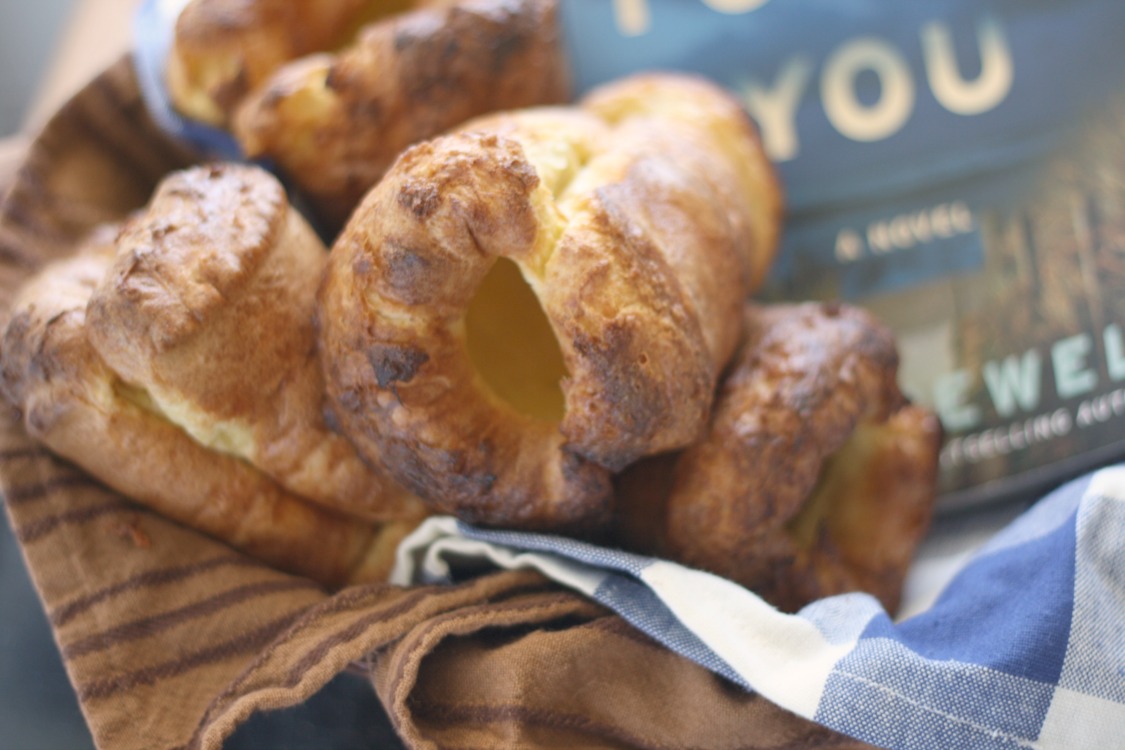
Today we're bringing you a Cinco de Mayo edition of #TwelveLoaves, featuring Mexican breads! I immediately thought conchas, since they are my favorite of all Mexican breads, but since I've already posted two concha recipes in the past (and have another one coming up in the semi-near future), I decided to choose something else. A type of bread that I'd never made before, but had been meaning to—telera rolls.

Teleras are the base for tortas, aka fabulous Mexican sandwiches. Obviously you can stuff them with whatever you like, but my hands-down favorite kind is a torta con milanesa de pollo (chicken breast pounded thin, breaded and fried). If the hubs and I go out for lunch when the kids are at school, that's pretty much what we both order. Every. Single. Time.
Monday, January 17, 2011

Making Queso Fresco (and refried beans)

Monday, January 17, 2011

Making Queso Fresco (and refried beans)

Another favorite around here?  Queso Fresco!  We use it on almost everything from tacos to enchiladas to sopes to gorditas to flautas to tortas to pasta to chilaquiles to quesadillas.  I love it!  Queso Fresco is a fresh Mexican cheese...that is soft and somewhat moist...but perfect for crumbling.  It doesn't really melt, but I LOOOOVE the way it tastes when it's warm.  It's sort of spongey and salty and milky. Mmmmm!  In all honesty, I usually buy it.  That's because I had yet to find a recipe that gave me what I was looking for.  Well folks, those times are through.  The MAN has come through...as if I ever had any doubt.  The longest part of the process is the culturing step...but it all hands-off, so don't let that scare you away.  I used citric acid (as opposed to the lime juice) when making the cheese since I already have it on hand for cheese making.  If that scares you or you don't have any readily available, then try the lime juice method!  Another thing...you may be tempted to dump the salted curds into a mold, but it really isn't necessary.  Simply gathering them together into the shape of a disk is perfectly sufficient.  Not to mention- gorgeously rustic!

Queso Fresco
makes ~1 lb.

1 gallon whole or 2% milk (remember, the richer the milk/flavor, the better the cheese)
2 c. buttermilk
1 tsp. Citric Acid (sometimes called sour salt)
OR
1 c. fresh lime juice
1 tsp. salt (pure, fine-ground sea salt works best)

 Culture the milk.  Pour milk into a very large pot over med-low heat.  Stir in buttermilk.  Bring milks to 75° F, turn off heat, cover pot and let sit for 3-4 hours.

 Set the curd.  If using citric acid, stir it into ¼ c. cold water, continuing to stir until dissolved.  With lid off pot, turn heat to medium and stir dissolved citric acid or lime juice into milk mixture.  You will immediately see small curds start to form.  Every couple of minutes, stir slowly, gently, & thoroughly over entire bottom of pot until milk reaches 195°F, ~20 minutes.  At this point the curds will be very obvious, floating in the milky-transparent whey.  Remove from heat, let stand five minutes without stirring so all the curd can rise to the top.
  Drain the curd from the whey.  Wet a large piece of cheesecloth and line a large colander with it.  Set colander in sink (or over bowl if saving the whey).  Carefully ladle all of the curd into the colander. Gather the cheesecloth around the curd and gently squeeze to expel a bit more whey.  
Unwrap curd onto a plate, break it up, and sprinkle w/ the salt...working it in with a spoon or your fingers.
Gather the cheese curds into a 1" thick disk, transfer to a plate, cover, and refrigerate until thoroughly chilled.
After it's chilled in the refrigerator, it is ready to use! It should last about 5 days or so, covered and refrigerated.
My preferred method is just crumbling a bit off and onto my plate...or into my mouth.  And I must say...I like it while it's still warm, too...before it's even gone in the fridge and had time to set.
Simple Refried Beans

 ~1 Tbs. bacon grease, lard, or olive oil
~1-2 c. cooked pinto beans w/ some cooking liquid
garlic powder, onion powder, cumin, chili powder, salt, & pepper, all to taste

Heat fat in a large skillet over medium-high heat.  Add in beans w/ some cooking liquid.  Mash them up with a potato masher and continue to toss until they are a bit dried out.
Stir in spices to taste, cook for another few minutes, and then remove from heat.  Serve.
One of my favorite ways to put it all together is to make a Torta.  Slice a bolillo or telera bread in half and toast, cut side down on a hot skillet until browned.  Spread some hot refried beans on the bottom bun.  Scatter crumbled queso fresco over the beans. Layer on some sliced tomato.  Add some meat if you wish...I used Peperoncini Beef.  Scatter lettuce or cabbage over that along with some cilantro, avocado and some salsa.
*Also, check out my friend Mely's post over at Mexico in my Kitchen...she gives a great Queso Fresco tutorial using a different recipe!

I am sharing this post with:
forgingfromagebutton2 flash-back Friday Cookin' for my Captain

Thursday, August 19, 2010

Tortas con Chile Colorado

Thursday, August 19, 2010

Tortas con Chile Colorado

When somebody poses a question or a challenge like this, I just have to answer...  


"I am very sad, my friend's had two great Mexican restaurants but they closed the one by my house and the cook at the other is not as good. So, now I am planning on learning to cook good Mexican all by myself! Do you have a good recipe for Chile Colorado? I adore that chunked beef in sauce, but when I asked them the recipe, a lot of what they used didn't resonate with me..."

...it's in my nature.  

That would be my friend Alex from A Moderate Life.  To be completely honest though...I had never heard of Chile Colorado until she mentioned it.  So, I turned to the expert (not Mexi, the other one...Mr. Bayless).  Actually Mexi hadn't heard of it either, so it must not be popular in  the region of Mexico that he is from.  I kind of went into it thinking that it would be a type of stew, similar to chili. Like chile con carne.  It's not.  What it actually is is a filling...for tacos, tamales, enchiladas...you name it!  So, carne con chile. Well, okay then.
Although Rick gives a few variations on chile colorado, I decided to go with the one that uses beef.  It was, afterall, the chunked beef that Alex adored so much...how could I not?

Chile Colorado

by Heather Schmitt-Gonzalez
Prep Time: 40 minutes
Cook Time: 90-120 minutes
Keywords: simmer entree sandwich beef chiles Mexican

Ingredients (serves 4)
  • 5 ancho chiles - stemmed, seeded, deveined
  • 5 garlic cloves, peeled & smashed
  • 1 teaspoon dried Mexican oregano
  • 1-1/2 teaspoons cumin seeds (or a generous 1-1/2 teaspoons ground)
  • 1-1/2 Tbs. lard, vegetable oil, or bacon grease
  • 2 pounds beef chuck, cut into chunks (or coarse ground or chopped)
  • 1-1/2 c. beef stock or broth + a bit extra as needed
  • 1/2 cup beer
  • ~1/2 teaspoon salt
  • 2 tablespoons masa harina
Instructions
Heat a heavy skillet over medium and tear chiles into flat pieces. Toast them on hot surface a few at a time, pressing them down firmly w/ a spatular for a few seconds, until the crackle and change color, flipping and repeating. Transfer them to a large bowl and cover w/ boiling water, using a plate to keep them submerged, soaking for 30 minutes. Drain, reserving ~1 c. of the soaking liquid.

Transfer the chiles and reserved liquid to a blender jar. Add garlic, oregano, & cumin (pulverized first if using whole seeds) and blend until smooth. Strain through a medium-mesh strainer.

Heat the fat in a large skillet or Dutch oven over medium-high. Dry the chunks of meat w/ a paper towel and lay in hot skillet in an uncrowded, single layer. Fry until meat is nicely browned, ~10 mins, turning and scraping as needed.

Add the chile puree to the pan. Continue to fry for ~4-5 mins, stirring & scraping, or until puree is very thick and noticeably darker. Scrape mixture into medium-sized saucepan (or just leave it in the Dutch Oven). Stir in salt and liquid. Bring to a boil, partially cover. Reduce heat to simmer and cook, stirring occasionally for 60-90 minutes, or until meat is very tender. Just before serving, thin with a little water or broth and stir in the masa harina. Let simmer until nicely thickened. Adjust seasoning, if necessary.

Serve with a side of rice and beans, or scoop into a bolillo or telera roll that has been cut in half and toasted lightly with your toppings of choice for a delicious torta!

adapted from Authentic Mexican by Rick Bayless
I went ahead and used my filling in tortas for dinner that day.   I toasted the bolillo on the cut sides, then flipped and added crema, romaine, cilantro and the hot chile colorado.  I added the tops and toasted both sides...sliding in some avocado at the end. Soooooo good.  And Alex, I couldn't keep my fingers off those chunks of beef, either!  I hope this is one that will resonate with you!
Monday, August 31, 2009

I am a Queso Cabeza...Fromage la Tete...Cheese Head.

Monday, August 31, 2009

I am a Queso Cabeza...Fromage la Tete...Cheese Head.

I finally saw Julie & Julia....and I am sooooo in love with it. It was like sneaking a peak at little aspects of my own life up on the big screen. It was so well adapted and acted. Meryl Streep. That's all. Meryl Streep. Not to take away from the rest of the cast because I thought they were all amazing in their parts. I laughed. I cried. I'm eagerly awaiting it's release on DVD. This has absolutely nothing to do with the subject of this post...I just couldn't help but let out a little giddy! On second thought, I suppose it has a little bit to do with this post...I mean, Julie was exploring, cooking and learning of her love for food...and I continue to do that every day. So, in that itty bitty way, it relates. Cheese. Fromage. Queso. That my friends, is the subject today. I know that I've told you how much I heart cheese. I am a cheese head (no matter that I only lived in Wisconsin for approximately 4 months....it comes from within). I'm breaking my way into cheese making slowly. Very slowly. I made mozzarella a while back...and tried my hand at goat cheese, which didn't work...but I'm blaming that on the ultra-pasteurized goat milk. It was all I could find and ultra = no good bacteria. Although if you check out my partner in cheesey-crimes blog Living in the Kitchen with Puppies, you'll see some tasty looking goat cheese that did turn out for her. This time, we decided to make Queso Blanco*. Queso Blanco is a fresh cheese, made from direct acidification (adding acid to the milk). It is then drained &/or pressed into shape. This makes it a great crumbling cheese...but it doesn't melt! So, you can fry it up in a pan (like JennyMac did here). Although we participate in a group of cheese makers, that is semi-monthly (or so) and we are super impatient, so Natashya & I found some recipes (okay, she found them and shared them...but I suggested the type of cheese) for Queso Blanco and decided that we cheese waits for no one! So, without further delay, I bring you....Queso Blanco. Sort of a general recipe, some use white vinegar, some us cider vinegar and some use lemon juice...

Queso Blanco 1 gallon whole milk (raw works & tastes best...but if you don't have access...regular will work) 1/4 c. cider vinegar sea salt- to taste Heat your milk slowly in a large heavy pot until it reaches 180 degrees F. Turn off heat and stir in vinegar. Let sit for 10-15 minutes (you will see a thick mass of curds). Line a sieve with cheesecloth (folded over 4x) or butter muslin. Set the sieve over a very large bowl and scoop or pour your curd into the lined sieve. Save this leftover liquid (whey) to make ricotta (which I'll show you another day), use in baking bread or pouring over your compost pile or into your garden. Lift the sieve from the bowl and place over an empty bowl. Fold over the edges. Place a small plate and some weights on top (to help press out extra whey). Refrigerate for 5-7 hours.Remove from the refrigerator and use any whey in the bottom of the bowl as you used the previous whey.Remove the plate & weight. Peel back the cheesecloth and place cheese in a bowl. Stir in sea salt to taste, if you wish. Kind of a strange way to add the cheese, right? Well, I just sprinkled it over the outsides. I think it needed a bit more salt...I wonder if you could add it earlier in the process with good results? I'll try it next time.You'll notice that I made mine in a regular old metal strainer, but you can use a cheese mold if you have one. I just ordered and received some from The Cheesemaker, but I really wanted a nice, rustic (my favorite food-related word) "disc" of cheese for this one. Unmold your cheese onto a plate or cutting board and use it within a day or two (in my opinion).

How should I use my queso blanco you ask? My favorite way is with Mexican food...like this Torta con Milanesa de Pollo...Go on over and check out Natashya's Queso Blanco here!

*Queso Blanco, while fresh, is not to be confused with Queso Fresco. Queso fresco is made by using rennet & cultures and will yield a similar cheese...but it is a bit firmer in my opinion. Plus, it'll melt if ya try. I'll make Queso Fresco soon...promise Dani.

"Blessed are the cheesemakers." -Monty Python

Wednesday, April 22, 2009

I'll just sit back and watch him cook.

Wednesday, April 22, 2009

I'll just sit back and watch him cook.

I love it when Mexichef heads into the kitchen and I sit back to watch! I'm only ever sure of one thing...it will be Mexican food. Okay, two things...it will be awesome. Tortas are one of our favorite things around here...use either Bolillo Bread or Telera Bread and your favorite fillings...and you have a tasty, portable (somewhat) meal. We definitley paper-plated this one! Mexichef is not very organized...when he cooks there are ingredients strewn all over, ALL OVER the kitchen. Most of the pots & pans are dirtied, and the counters need a good scrubbing. Oh well, it's worth it! Tortas con Todo (Tortas w/ everything) by mexichef This is more of a process than a recipe...this is the way he did it and the ingredients he used. Heat a large skillet over medium-high heat. Cook some chorizo. Add thin sliced beef in the chorizo grease and fry it up. Once those are cooked, add sliced onion, jalepeno and cook down a bit. Place sliced ham over the top.

Meanwhile, heat a comal or a skillet. Melt a little butter on it. Add bread, sliced side down until nice & toasty. Sprinkle queso fresco over the top & let it get a little melty. Place half a bun over filling to measure and "cut" around with a spatula. Add more yummies, such as sliced avocado, shredded lettuce, tomato, more cheese, crema, cilantro, salsa and a squeeze of lime! Now I sit back and enjoy a plate of my hubby's labors. Muy Ricos!