posts may contain Amazon affiliate links, which earn me a small commission when you buy (but doesn't cost you anything extra). Occasionally I receive free products and/or run sponsored posts—this will always be stated clearly in the post. Thank you for supporting this blog.

This website contains some quotations, excerpts, and screen clips from copyrighted material. These uses fall well within the copyright doctrine of "Fair Use".
Sunday, January 30, 2011

Sesame Seed Pitas + Chickpea Sauté w/ Broccoli, Cauliflower, & Hummus

Whenever we (husband and I) are craving a hearty meatless meal, this is what we seem to make.  Pungent flavors.  Warm, toasted bread.  Satisfying, belly-filling goodness.  We repeatedly crave this simple dish that came about once upon time, many years back, when I had leftover chickpeas from making a big, honkin' batch of hummus.  Because we looooo-hooove (um yes, that's supposed to be a sing-songy love) homemade hummus, as well.  It may seem kind of redundant.  Eating hummus with another chickpea dish.  Oh well.  It's brilliant together.  The difference in both the textures and the tastes taste need each other.  The meal is not complete with one component missing.  This time, however, is the first time I've ever made the pitas to go with it from scratch.  And now.  Now!  It pushes our favorite meatless meal over the edge....and we're glad to jump off after it.

Sesame Seed Pitas
from The Food Matters Cookbook by Mark Bittman
makes 12 pitas

1½ c. all-purpose flour, plus more as needed
1½ c. whole wheat flour
3 Tbs. olive oil
1 tsp. instant yeast
2 tsp. salt
1 c. warm water + more as needed
½ tsp. honey
2 Tbs. sesame seeds

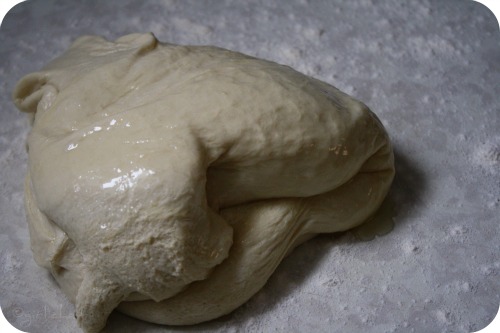
Combine flours, oil, yeast and salt in a food processor.  Turn machine on and add 1 c. warm water through feed tube along w/ honey and sesame seeds.  Process for ~30 seconds, adding more water, a little at a time, until mixture forms a ball and is slightly sticky to the touch.  If it's dry, add 1-2 Tbs. water and process for another 10 seconds.
Put the dough in a bowl and cover with plastic wrap. Let rise until doubled in size, 1-2 hours.
When dough is ready, lightly flour your hands and the work surface.  Form dough into a ball and divide into 12 equal pieces.  Roll each piece into a small ball.  Put each ball on a lightly floured surface, sprinkle with a little flour, and cover with plastic wrap or a towel.  Let rest until they puff slightly, ~20 minutes.
 Roll each ball less than ¼" thick, using flour to prevent sticking as necessary.  As you work, spread flat disks on a floured surface and keep them covered.  Dough should sit for 20 minutes before baking. When all the disks are rolled out heat oven to 350° F.  If you have a pizza stone, set it on the lowest rack in the oven, otherwise lightly oil a baking sheet and set it on middle rack in oven.
Slide as many disks as will fit on the stone or sheet pan into the oven using a pizza peel or large spatula.  Bake until lightly browned and puffed, then flip to the other side.  They should puff up a bit when ready.  Average baking time is ~5-6 minutes total.
If you wish, you can brush them with a little more olive oil when you remove them from the oven.  Eat right away or cooled, stored in wax paper or plastic bags...gently reheated before eating.  They can also be frozen.
That favorite meatless meal I was talking about earlier?  It's so incredibly simple...yet so incredibly addicting!

Chickpea Sauté with Broccoli, Cauliflower and Hummus
Heat a bit of olive oil in a pan over medium-high heat.  Add some thinly sliced onion and cook for a few minutes, or until soft.  Add in some minced garlic and cooked, drained chickpeas.  Cook until the chickpeas start to get some brown spots on them.  Add in some blanched cauliflower and broccoli.  Cook until they get little crisp, brown spots on them, too.  Throw in some read pepper flakes, a squeeze of fresh lemon and some freshly grated Parmesan cheese.  Season to taste with salt and pepper.  Serve with some freshly made Hummus.  Scoop it all up into a hot pita.

Just don't say I didn't warn you of its addictive qualities!


I am sharing this post with...
*Yeastspotting!
Saturday, January 29, 2011

Cookbook Review: The Good Neighbor Cookbook

Just short of two years ago, I was making my way around the inside perimeter of our new house with my sage smudge stick...clearing the air of any lingering negative energies...readying it for our family to start a new chapter of our lives in.  I had just finished when I heard a knock on our never-before-used front door.  A smile and a plate of proffered cupcakes.  A "welcome to the neighborhood" from the couple (and their dog) across the street.  It was a simple gesture, but it meant the world.  Open arms reaching out instead of what could have been furtive glances over turned shoulders. 

There was also a time almost seven years back when we came home from the hospital with our new bundle of joy swaddled into that tiny...yet ridiculously heavy...car seat.  One and a half year old in tow and a wide-eyed six year old bounding ahead.  The last thing we wanted to do was think about what was for dinner.  Fortunately, a weeks worth of dinners was set to start that night.  They arrived with warm congratulations and coos for the sweet baby.  Bags, boxes, pots and pans...and the best thing of all...they were ready to eat!  I did make sure I was on the giving end of this supportive chain of meals for moms for quite a few years, as well.  Because there's nothing like coming home from the hospital with your first or your fifth and having your meals already prepared!

This is the basic premise of The Good Neighbor Cookbook by Sara Quessenberry and Suzanne Schlosberg.  "125 Easy and Delicious Recipes to Surprise and Satisfy the New Moms, New Neighbors, Recuperating Friends, Community-Meeting Members, Book Club Cohorts, and Block Party Pals in Your Life!"  I love this concept and the book is filled with fantastic ideas and tips in each chapter.  The first chapter, Bringing Home Baby has not only recipes but talks about everything from nourishing the new mom (did you know that introducing a variety of flavors into the diet of a breastfeeding mom is thought to make less picky eaters later!?) to organizing a meal train for the family of the newborn.  

I decided to make a batch of the Brown Butter Blueberry Muffins from this chapter, which the authors say are great to have around for "breakfast or an odd-hour pick-me-up."   I agree!  The subtle nuttiness lent by the brown butter flecks the batter with an extra layer of comfort.  The fat blueberries add antioxidants.  You may know that I'm not the biggest muffin fan in the world, but these are some that will stay in my arsenal.  My favorite blueberry muffin by far.  Now.  I must go hunt down some pregnant ladies...
In the second chapter, Get Well Soon, recipes have been selected with particular ingredients that are rich in healing properties and immune-boosting nutrients...plus, since people are less active than usual when recovering, the recipes tend to be lighter.  Plus they throw in some more great ideas for organizing, planning, and adding a little something for the caregiver.

Welcome to the Neighborhood (chapter three) ranges the gamut from ideas on quick bites, whole meals, and things for the weary, moving-box-hauling, tired new residents to little "extras" you may want to include in your delivery such as your favorite local spots.
Chapter four brings us to Block Parties and Barbecues.  Included is everything from main dishes to side dishes to meatless options and desserts.  Suggestions for divvying up dishes so that you're not faced with a table full of desserts and nothing to nourish your belly beforehand.  Also included are lots of fun seasonal ideas for adding an unexpected twist with herbs.  Moving into chapter five, Meet and Eat, you'll find ideas to add life to what could be a lackluster meeting or agenda with "freshly made finger foods, sweet treats, and satisfying breakfast entrĂ©es."  It also includes ideas for fixing up store-bought food if you're in a hurry and don't have time to make something before the gathering.

Chapter six talks about Novel Ideas for Book Clubs.  A book in one hand and the other free to grab goodies such as these utterly irresistible Rosemary and Chili Spiced Cashews.  Feel free to wave your arm around in excitement while discussing your ideas on the latest book choice...if you can keep them out of these nuts!  Seriously.  They're addictive.
Or perhaps you'll be sidling over the side table that has a bowl of these super-easy to prepare Lemon and Garlic-Marinated Mushrooms.  Admit it.  Food that you have to pick up with toothpicks is fun.  These mushrooms are fantastically bright from the lemon and laced with paper-thin shards of garlic.  Yum.
Now, at the time I didn't really realize it, but apparently I was lingering in the Novel Ideas for Book Clubs chapter.  That's just so like me.  But if I hadn't been, I wouldn't have found a sweet treat bring along that is sure to satisfy both chocolate and spice lovers, these Chocolate Chip and Candied Ginger Blondies.  They're sweet and addicting and a bit different form the norm. I will tell you, however, that if somebody does not like candies ginger...then don't try to slip one of these under the radar and into their hand.  I love candied ginger...the hubs and oldest son think it tastes like soap.  So do I even have to tell you that while I enjoyed a few blondies in moderation...they turned up their noses at one bite.  Ah well.  Can't please everyone all the time.
The final chapter is Condolences.  Whether you're delivering a meal in the period immediately following the loss of a loved one or stopping by a month or so later when perhaps they've worked through a fridge full of immediate deliveries or even on the anniversary of their loved ones death, the recipes in this chapter are sure to bring comfort and ease the burden on a heavy heart.  At least for a while when they're enveloped by a plate, dish, or bowl of homemade goodness...such as this Chicken Tortilla Soup.  It's warm, rich, and complex and guaranteed to bring a little happiness to anybody.
So.  That said.  I definitely recommend you check out a copy of The Good Neighbor Cookbook if you're the type of person who loves the idea of sending some homemade comfort to loved ones and strangers alike.  Or if you just want more delicious ideas and recipes for your arsenal...it's packed with thoughtful ideas and delicious recipes.

*I received a copy of this book at no charge from the publisher to review, should I choose.  I received no compensation for my review and the reviews stated in this post are all mine.  MINE!  My opinions.  Thank you.
foodiesreadingchallenge

Friday, January 28, 2011

Fried Nutella "Ravioli"

I went through two jars of Nutella over the last three weeks.  I was trying to devise a somewhat unique dessert using Nutella.  Funny thing is, none of that Nutella actually went into a dessert.  It all got spooned into mouths or slathered on toast.  I suppose just having it around was inspiration enough.  Evil, tempting, beckoning inspiration.  Oh yeah.  It reached out and tried to stop me every time I walked past the pantry.  Occasionally I'd skirt by with a quick hip twist...or a silent tip-toe...or an exaggerated cartoon-spy-high-knee-step-forward-head-bob.  You know?  But usually it would snag the hem of my shirt just before I made it safely by. And then, before I knew it, there was a spoon in my hand.  I'd almost resigned myself to the fact that inspiration was just not going to strike.  Until it suddenly did.

This dessert is best made for a small gathering.  You want the fried ravioli to be warm when you eat them.  Plus, after about six of them have taken their dips in the oil, you don't want any others sharing that sizzling tub.  Any stray nuts in the breading that have escaped will have turned too dark and the oil will start to taste bad.  So.  A romantic dessert for two...or three?...totally worth the effort!

Fried Nutella "Ravioli"
an original from the kitchen of girlichef
yield: 2-3 svgs. (6 ravioli)

12 wonton wrappers
~6 Tbs. Nutella
2 eggs
1 Tbs. water
½ c. hazelnuts
¾ c. fresh breadcrumbs
coconut oil, for frying

Begin by laying 6 wontons wrappers on your work surface, floury side down.  Place ~1 Tbs. Nutella in the center of each piece of wrapper.
Beat together your eggs and water (in a large, shallow bowl); brush the open space around the rim of the  wrapper with the eggwash, then place another wrapper on top, flour side up.  Gently press the wrapper into place, lightly squeezing out any air bubbles so that the two sides are sealed together.
Place the hazelnuts in the bowl of a food processor.  Add breadcrumbs and process until fine.  Dump breading out into a large, shallow bowl.
Line a sheet tray with parchment or foil (sprayed w/ pan spray).  Use the rest of the egg wash to, one at a time, dip each "ravioli" in.  Shake to remove any excess, then dip in breading mixture to coat.  Turning and pressing to make sure no empty spaces are left.  Transfer each the prepared sheet tray.
Freeze for at least one hour, or up to overnight.  

Just before you are ready to serve, heat coconut oil (or your choice) ~1" deep, in a deep-sided pan until it begins to shimmer.  I didn't check the temperature, but I'm guessing it was around 325°-350° F.  Set up a wire rack over a sheet tray.  Carefully lower one ravioli at a time into the hot oil.  Fry until crisp and just turning golden and flipping if necessary, ~2-3 minutes total.  Remove to wire rack and repeat until all of the ravioli are fried.
They are definitely best served warm.  Hot and toasty on the outside...and when you bite in, the warm Nutella in the center coats your tongue and threatens to dribble down your chin.  A few little bites of bliss!

I served mine with a quick raspberry sauce.  Simply spoon out a couple big globs of raspberry jam into a small saucepan and add in about a tablespoon of water.  Bring it to a quick simmer and let it thicken up a bit.  Pass it through a strainer to remove the seeds et voilĂĄ!  It adds a burst of fruity tang for a pleasant contrast.
This is my entry into the January edition of DESSERT WARS, theme: Go Nuts Using Nutella!


Prizes we're playing for this month at Dessert Wars-

*Update 2/5/11...What better day to find out that I was the winner of Dessert Wars: Nutella than World Nutella Day!! Thank you so much☺!
JanuaryDessertWarrior


Thursday, January 27, 2011

Untangling My Chopsticks ...with the latest Cook the Books selection.

When she was twenty-five, Victoria Riccardi left behind a good job, a good boyfriend, and a good apartment in New York City and moved to Kyoto, Japan.  Memory and longing led her to study tea kaiseki...and in turn gain knowledge in ancient Japanese traditions, wisdom, and customs.  While only there for one year, this multi course meal that evolved in the Zen monasteries of Kyoto and its link to Zen Buddhism would have great influence on her life.  You can read more in Untangling My Chopsticks by Victoria Abbott Riccardi, the latest Cook the Books selection.  I am always romanced into books like this.  Imagining myself dropping everything and going somewhere to to immerse myself in an unfamiliar culture.  Putting my finger on the pulse of the people the way I know best...through the kitchen.  I couldn't help but draw on my fondness for Memoirs of a Geisha once Riccardi arrived in Japan- describing the atmosphere.  Subtly stunning kimonos.  Cherry Blossoms.  The art of refinement.  Stark beauty. 

Tea kaiseki is a meal that is based on rice and comes before the actual formal tea ceremony.  During the ceremony a moist sweet will be served before the bowl of thick tea and a dry sweet will be served before the bowl of thin tea.  The food is subtle, beautiful, and it readies your palate...and your mind...for the actual tea.
Although the recipes nestled in at the close of each chapter called to me one by one.  What I would up making was inspired by the simplicity and beauty of the dishes presented for kaiseki.  Although this particular dish would never be served at a tea kaiseki because the amount of salt and chile flakes would dull your palate before the tea master presented you with your tea.  My friend Deb sent me a little package of ogo seaweed with some gorgeous red Hawaiian sea salt from Hawaii and I thought this was the perfect opportunity to put it to use.  And I just knew I wanted to use tofu when I read that Buddhists brought it with them to Kyoto...which now produces the finest tofu in all of Japan!
Tofu Poke
yield ~1 lb.

1 lb. tofu, pressed overnight & drained
~2 Tbs. Sesame Seed Oil
1 small bundle of dried ogo seaweed
Hawaiian Red sea salt, to taste
crushed red chile flakes, to taste

Cube the pressed tofu and toss with the sesame seed oil.  Rehydrate the dried ogo in hot water for two minutes, then squeeze dry and chop.  Toss with tofu and sesame oil.  Add in salt and red pepper flakes to taste.
Simple beauty.  Worth untangling your chopsticks for.
"I had tasted the origins of tea kaiseki at Enryaki-ji and at last experienced its spiritual roots." ~Victoria Abbott Riccardi
CooktheBooksClub foodiesreadingchallenge

Wednesday, January 26, 2011

Cheddar Scallion Ciabatta

It's been quite a while since Giada and I hung out in the kitchen.  I think we were initially so busy with the holidays and family and cooking up a storm...in our own respective kitchens...that we just never found the time to connect.  Because after all, it normally takes us quite a while to agree on something, so time is an issue. That said, we penciled in a few hours together yesterday and amazingly enough, we were both craving warm, cheesy, addicting bread.  No arguments.  No nitpicking.  No "my way is better than your way".  Just satisfied oooohhh's and mmmmmph's.  The one little thing I did insist on was making our own Ciabatta instead of picking it up from the bakery.  What can I say...I needed to warm up the house with the smell of bread baking.  She praised me for my brilliant ways...and brought her recipe for Cheddar Scallion Bread with her.
Ciabatta Bread
adapted from allrecipes
makes 2 loaves (~1¼ lb. total weight...just over ½ lb. each)

for sponge:
1/8 tsp. active dry yeast
2 Tbs. warm water (~110°F)
1/3 c. warm water
1 c. bread flour

for bread:
½ tsp. active dry yeast
2 Tbs. warm milk (~110° F)
2/3 c. warm water
1 Tbs. olive oil
2 c. bread flour
1½ tsp. salt

olive oil, for bowl
white cornmeal, for baking

    For Sponge: In a small bowl stir together the yeast and 2 Tbs. warm water.  Let stand 5 minutes, or until creamy. Add the remaining water and bread flour. Stir, cover bowl with plastic wrap and let sponge stand at room temperature for at least 12 hours. Mine sat for 21 hours and was beautiful and bubbly!
 For Bread: In a large bowl, stir together yeast and milk; let stand 5 minutes, or until yeast looks creamy. Add water, oil, flour, salt and the sponge to the bowl and stir with a wooden spoon until everything comes together into a somewhat sticky ball.  Turn out onto a lightly floured surface and knead for ~8-10 minutes.  Dough starts out sticky, but comes together into a nice, smooth ball when finished kneading.  Place into a large, oiled bowl and cover with plastic or a clean kitchen towel.
Let rise until doubled in size, ~1½ hrs.
   
Turn dough out onto a work surface that has been ever-so-lightly dusted with flour; divide in half. The dough is soft soft and sensual at this point.  Like seriously.  I got this goofy smile on my face...and I even heard myself giggle a little.  It's so soft and supple. 
 Work each half into an ovalish, rectangularish-shape that is ~9" long.   This dough lifts so willingly off of your work surface, yet clings just enough to hold it's shape when formed.  (If there is too much flour on the surface, it will be tempted to slide around...your bread can't cling.)
Transfer to a pizza peel, parchment or silpat set on the bottom side of a baking sheet (so you don't have a lip to contend with).  that has been sprinkled with white cornmeal. Simply push back into shape, then use your fingertips to dimple each piece of dough all over.  Dust each loaf with a tiny bit of flour.
Cover loaves with a warm, damp kitchen towel or plastic wrap. Let rise at room temperature until almost doubled in size, ~1½ hours.
If using a baking stone, place in oven on a rack in the middle of the oven.  Preheat oven to 400° F during last 20 minutes or so of rising time.
Slide the risen loaves onto the stone from your peel or baking sheet...or, simply place the baking sheet into the oven...and bake ~20 minutes, or until golden.  Transfer to a wire rack to finish cooling.
So obviously I started the Ciabatta a day ahead, since the sponge had to have some time to work its magic.  My loaves were baked and warm and waiting when Giada strolled in, tan and relaxed from the Southern California air.  Too bad it's only in the 20's here.  Perhaps we should have met in her kitchen.
Cheddar Scallion Bread
makes ~4-6 svgs.
(half this recipe to use just one loaf of the Ciabatta...or divide among the two loaves)

8 oz. sharp cheddar cheese, shredded
6 oz. butter, at room temp.
4 scallions, finely chopped
2 cloves garlic, minced
Kosher salt
freshly ground black pepper
1 (~1 lb.) loaf ciabatta bread, cut in half horizontally 

Place an oven rack in the center of the oven. Preheat the oven to 400° F.
In a food processor, combine the cheese and butter. Process until the mixture is smooth. Add the scallions and and garlic, pulse until combined. Season with salt and pepper, to taste.
 Spread the cheese mixture on the cut sides of the bread. Place on a baking sheet and bake for 10-12 mins., until golden.
Using a serrated knife, cut the bread into 1-inch thick slices and serve.
One loaf per person.  Yup.  That's the way we rolled that day.  Okay, I'm kidding.  I shared.  She didn't.

This post is shared with:
IHCC BYOB
*Yeastspotting!