posts may contain Amazon affiliate links, which earn me a small commission when you buy (but doesn't cost you anything extra). Occasionally I receive free products and/or run sponsored posts—this will always be stated clearly in the post. Thank you for supporting this blog.

This website contains some quotations, excerpts, and screen clips from copyrighted material. These uses fall well within the copyright doctrine of "Fair Use".
Sunday, April 10, 2011

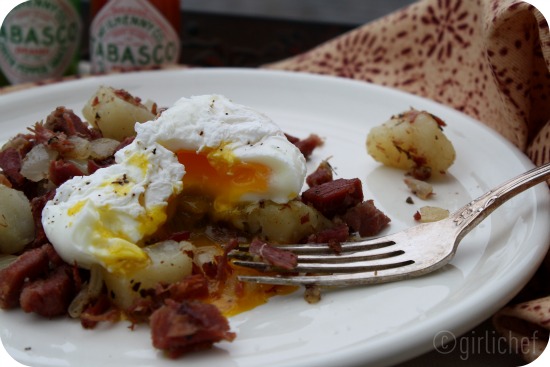
Corned Beef Hash ...with an egg

No time for talkin' today.  It's 74° and sunny and breezy and that seems to be making me unable to concentrate in front of the computer screen.  No complaints here, though.  Everything feels alive!  Birds are twittering (actual birds...not tweeps) high in the trees...squirrels are chasing each other up and down trees...kitty cats are whimpering at the windows...kids are running and playing and panting with flushed cheeks.  I must get out there and join in this bit of Spring bliss.  So, a post from the "draft" section...something that's been waiting for its chance to "get out", too... Corned Beef Hash made from that home-cured Corned Beef a while back.
Corned Beef Hash
Hmmm...not so much a recipe as a method.  Amounts are up to you, too.

Butter
Onions, diced
Garlic, minced
Potatoes, cooked & diced or cubed
Corned Beef, diced or shredded
salt
freshly ground pepper
Egg, cooked any way you like
Tabasco (or any hot sauce you like), optional

Heat some butter in a large skillet.  Add the onion and garlic and sauté until soft.  Add the potatoes and corned beef and stir everything around.  Cook for a few minutes until everything is heated through.  Season to taste with salt and pepper.  Cook an egg how you like it.  Put the hash on a plate and top it with the egg.  Sprinkle with Tabasco to taste.
Thursday, April 7, 2011

Onion Baguettes = Happy Days

There is no debating the fact that I need a new oven.  One that I don't have to set to 300° when I need the temperature to be 350°.  One that has more than one rack.  One that has a six-burner stove-top.  One with a window on the door.  Oh, better yet, two new ovens!  For ease on holidays.  One that has a hood with the sucking power of a bleep!, yet doesn't make a sound.  One that is wide enough to make a true baguette.  Or better yet, wide enough and deep enough and tall enough to bake six baguettes at the same time.  Oh, and while I'm building the perfect oven, how about one that can be transformed from convection to convention with the flip of a switch.  Oh!  How 'bout the second oven is wood-burning!  With a big, hot stone floor...for pizza and bread.  Working in restaurant kitchens definitely spoils you for a "regular person with limited funds" kitchen.  But I can dream with the best of 'em...so don't worry about me.  

I'm sorry.  Where was I?  I need a new oven.  And I'm reminded of that fact whenever I try to bake more than one loaf of bread at a time or something particularly big in one way or another.  While these baguettes may not be long and thin and svelte as the ones you're accustomed to, they definitely bring a smile to your lips and your belly.  The scent of warm bread and earthy onions floating on the air is enough to make me forget my dreams and live in the now.  For a few minutes, at least.
Onion Baguettes
adapted pretty liberally from Happy Days with the Naked Chef
makes 3 baguettes


for the dough:
just over 1 lb. white bread flour
~11 grams instant yeast
1 Tbs. sugar
1 Tbs. fine sea salt
just over 1 c. tepid water
ladleful of sourdough starter (optional)*

for onion topping:
olive oil
2 cloves garlic, sliced thin
1 large yellow onion, sliced thin
small handful fresh thyme, leaves stripped
sea salt
freshly ground black pepper
white wine vinegar

Whisk together flour, yeast, sugar, and salt in a large bowl.  Make a well in the center and add sourdough starter and water.  Stir with a wooden spoon to combine, then turn out onto a work surface and knead until smooth and elastic, ~3-5 minutes.  Transfer to an oiled bowl, cover with plastic wrap or a clean kitchen towel and let sit in a warm place until doubled in size, ~45 minutes to an hour.

Turn dough out onto a lightly floured work surface and gently poke all around with your fingertips.  Divide into three equal portions.  Form each into a baguette and transfer to a lightly floured pizza peel (if baking on a stone) or sheet tray (if baking directly on tray).  You can make long, skinny baguettes if they will fit in your oven...unfortunately my oven isn't the one of my dreams, so mine have to be a bit shorter and fatter than an ideal baguette.  Cover and let rise until doubled in size again, ~45 minutes to an hour.  Preheat oven to 350° F. during last 15 minutes of rise time.

In the meantime, heat a big glug of olive oil in a skillet over medium-low heat.  Add garlic, onions, and thyme and cook, stirring from time to time until everything is soft and onions are translucent (without browning), ~5-7 minutes.  Season with salt and pepper and a splash of the vinegar.  Stir and set aside until baguettes have risen.
Divide onion mixture evenly amongst the risen dough and slide into the preheated oven (either onto preheated stone or the whole tray).  Bake for ~35-40 minutes*, or until baguettes are golden and onions have started to get dark and crisp up in spots.  Remove from oven and cool on a wire rack.

*If you are making this without the ladleful of sourdough starter...and/or your baguettes are longer & skinnier than mine...your baguettes could be done in as little as 15 minutes, so start checking them earlier, if you've made either of those changes.
Split lengthwise, this made some fantastic sandwiches...spread generously with some beautifully stinky Garlic-Herb Boursin and some falling-apart-thin smoked ham.  Happy Days.
IHCCJamieOliver
 What brings you Happy Days (...other than Nick at Nite)?
Also sharing this post with:
*Yeastspotting!
BYOB-badge fridaypotluck FCFButton freshfriday-1 foodfriday Let's Break Bread Together

Wednesday, April 6, 2011

Cookbook Review: Heartland by Judith Fertig ...and Grilled Duck Breast w/ Wild Rice-Dried Cherry Pilaf

"The Heartland, or Midwest, is the center section of the United States, which also happens to be its agricultural core."  This is a line from the introduction to Heartland: The Cookbook by Judith Fertig.  As much a coffee table book as a cookbook, it is filled with beautiful, candid photographs of the food, the people, the land, and life throughout the Midwest.  The recipes span from breakfast to late night snack using the fruits (and meats and grains and veggies and nuts) grown and raised throughout the Midwest.  As a girl raised in the midst of all this glory, I was immediately drawn to this book.  Features on family farmers and sources for milk from grass-fed cows and descriptions of Heartland beef cattle breeds are interspersed amongst quotes from familiar names and tons of fun historical tidbits about what comes from this land.  This book has earned its place on my coffee table and winds up in the hands of every person that sits on the sofa...unsuspecting at first, but shortly enthralled.

Of course I have numerous strips of paper sticking from the top and bottom of the book, marking future kitchen endeavors like Farmhouse Breakfast Sausage, Smoked Gouda, Hunter's Pie w/ Buttery Mashed Potatoes, and Root Beer Funnel Cakes just to name a few.  The Honey Buns I made a few days ago were adapted from the No-Knead Clover Honey Dough and Cider-Glazed Cinnamon Rolls.  I thought another thing I'd make right away was a recipe using duck, so that I could use some beautiful duck breasts raised right here in Indiana.
Grilled Duck Breast with Wild Rice-Dried Cherry Pilaf
serves 4

Sorghum-Lime Grilling Paste:
2 cloves garlic, minced
juice & grated zest of 1 lime
2 Tbs. sorghum syrup or dark brown sugar

4 boneless duck breast halves
fine kosher or sea salt
freshly ground black pepper

Wild Rice-Dried Cherry Pilaf:
2 Tbs. lard or oil I used rendered duck fat
1 medium onion, chopped
1 c. wild rice
3 c. chicken broth
½ c. long-grain white rice
½ c. dried cherries
1 Tbs. sorghum syrup or honey
fine kosher or sea salt
freshly ground black pepper
For the grilling paste, whisk the garlic, lime zest, and juice, and sorghum together.  Score the fat on each duck breast half, then season with salt and pepper and brush with grilling paste.  Let marinate at room temperature for 1 hour.

Meanwhile, prepare a medium-hot fire in your grill, and make the pilaf.  In a large saucepan, heat the fat over medium-high heat and sauté onion until translucent, ~4 minutes.  Add wild rice and broth, bring to a boil.  Lower heat and simmer, covered, for 20 minutes.  Add white rice, dried cherries, and sorghum.  Cover again and cook for 20 minutes, or until all the rice is tender.  Season to taste with salt and pepper and keep warm.

Grill duck breasts, fat side down, for ~4 minutes, keeping a spray bottle filled w/ water handy in case of flare-ups.  Turn and continue grilling for another few minutes, or until duck reaches an internal temp. of 140-145° F for medium-rare.  I cooked ours a bit longer because everybody in this house, aside from me, freaks out at the mere mention of red meat. Ugh.  Transfer to a platter and let breasts rest for 5 minutes before slicing.  

Slice on the diagonal and serve with pilaf.
You see the Heartland "in the mysterious deep green gloom as you wander into an Indiana cornfield."

*I received a free copy of this book from the publisher to review, should I choose. All opinions stated in this post are 100% mine.
sharing this post with:
foodiesreadingchallenge foodpalette pink Miz-Helen-Badge-ALT5

Tuesday, April 5, 2011

Whole Wheat Goldfish Crackers ...and a few Sharks (for good measure)

HERE'S WHAT PEOPLE ARE SAYING...

"I think these taste better than the store kind."  ...Drama Queen
"Good.  They taste like cheesy bread." ...Lyrical Teen
"Awesome." (with the 'ok' sign formed on his hand held high) ...Sweet Thang

Met with strong reviews, these Whole Wheat Goldfish Crackers have earned a place on our pantry shelves.  This was one of those recipes that I knew I was making before I even read past the title.  Kids love goldfish crackers.  At least I think I can generalize and say "kids"...because I've never met one that didn't.  I imagine there's a few out there that don't (mingling with the kids who don't like pizza), but for the sake of being right, I'm going with the generalization.

This could be something that I end up making 'til the end of time, because there will always be kiddos needing snacks.  I varied from the original recipe in that I added a bit of garlic powder to the dough.  I also went with the higher amount of onion powder.  While they went over well, I'll probably try them next without that pinch of garlic and with the lesser amount of onion.  Plus, you could "un" whole wheat them and use all all-purpose flour, too.  I'll probably try that one of these days, too.  And now that I have the cute little fish cutter, I'll probably try making fishy graham crackers, too.  And I've been wondering how they make the pretzel goldfish.  I haven't looked into it yet, but how fun would it be to make mini-pretzel goldfish?  Is that even possible?  We'll see...
Monday, April 4, 2011

Fried Eggs on Garlicky Fried Rice w/ Chile Vinegar

Fried eggs perched atop garlicky fried rice?  Oh yes, it's what's for breakfast.  Or lunch.  Or possibly even dinner.  Yes, I feel for garlic the way some people feel about chocolate.  It makes me happy.  If I see a recipe, article, blog post, book, tv show...whatever!...with some form of the word garlic in it, I have to investigate.  One of these years I hope to get to a garlic festival so that I can roam free amongst my own kind.  Fortunately, the hubs is one of us.  But wouldn't it be great to feel the affirmation of those around me?  To be welcomed by the soft yet sharp, subtle yet pungent whisper of garlic riding the breeze.  Perhaps I should look into the public school system and living conditions in Gilroy.  Hmmm.  I'm off to do a little research while you enjoy a plate of garlicky goodness.
Garlic Fried Rice w/ Chile Vinegar & an Egg
adapted from (My Favorite Philippine Breakfast) Sundays at Moosewood Restaurant
makes 2 svgs.

1 Tbs. olive oil
1 large garlic clove, sliced thinly
2 c. cooked Brown Basmati rice
2 eggs (or more if you wish)
coarse salt, to taste
chile vinegar (mine is jalapeños & de arbol in cider vinegar), to taste

Heat oil in large skillet or wok and fry the garlic pieces until barely golden.  Remove garlic and reserve.  Stir-fry the rice until hot and well coated with oil.  Take off heat and stir in reserved crispy garlic slices.  Remove to plates and quickly fry up (or cook however you wish) the eggs and slide them on top.  Sprinkle with salt and serve with the chile vinegar so each person to splash on as much as they like (or take a chile from the vinegar and eat it with the rice).

Moosewood-logo-small-1 midnight maniac meatless monday just another meatless monday veganmondays

Sunday, April 3, 2011

Patty Melt + The Encyclopedia of Sandwiches by Susan Russo (cookbook review)

Patty Melt
Let me just preface this post by saying something:
I Love Sandwiches.

The Encyclopedia of Sandwiches
The Encyclopedia of Sandwiches is the latest release by Susan Russo (you may recognize her from her blog, Food Blogga).  We're a sandwich eatin' kind of family, so I was pretty stoked when this compact, comprehensive little guide to all-things-sandwich arrived on my doorstep.

Yes, it lives up to its name. It starts with the All-in-One Breakfast Sandwich and ends with a Walleye Sandwich (let's say they are the two slices of bread, you know... for all intents and purposes) and has sandwiches (the meat, the cheese, the veggies) that run the alphabet gamut layered in between.

There is both history and trivia that will delight both the sandwich aficionado and the sandwich virgin (Are there really any of those left out there?  We start so early these days...from the highchair, almost...) not to mention recipes that will bring back blasts from the past, like my childhood favorite, a bologna sandwich (mine with cheese, mustard, and Doritos...thank you very much) or a meatloaf sandwich.

There's lighter fare like a Grilled Portobello Sandwich or the Curried Chicken Salad Sandwich and the extreme opposite of light fare, the Doughnut Sandwich.

I found sammies I'd never heard of that I totally want to try, such as the Frittata Sandwich and the Italian Tuna Salad Sandwich and even a Spaghetti Sandwich.  But I also found sammies that already top my list of favorites, like the Monte Cristo, French Dip, BLT, Hot Roast Beef, Club, Liverwurst, Cuban, Torta, Reuben...I could go on.

I told you I loved sandwiches.

The two I've tried so far are the Fluffer Nutter which I'd heard of, but believe it or not never actually tried before.  Ever. In my Life.  Not even as a kid.  I don't think I remember ever having marshmallow fluff in the house.  It was kinda sweet for me, but I can see how a kid might love it.  It's like eating dessert for lunch.  Marshmallow and peanut butter will definitely be hanging out together in a dessert at my house in the near future.
Fluffer Nutter Sandwich
The second sandwich from the book that I wanted to test out was the Patty Melt.  Now, unlike the Fluffer Nutter, I have had a Patty Melt before...many times throughout the years, but I don't think I've ever actually made one at home. Why!?  So simple.  So perma-grin inducing.  So tasty.  The only thing I did different is add a bit of  "sauce" to moisten it all up a bit and add an extra hit of flavor.  That's how I've always eaten them, so yes, that's how I like 'em.

Patty Melt
(makes 1)
slightly adapted from The Encyclopedia of Sandwiches

2 tablespoons unsalted butter
1 small yellow onion
1 (1/4 pound) hamburger patty
salt & pepper
1 slice swiss cheese
Thousand Island or Russian dressing (my addition - because it makes the sandwich!)
2 slices rye bread, toasted and buttered

In a nonstick skillet over medium heat, melt butter and add onions. Cook slowly, stirring from time to time until onions are golden and caramelized, ~15-20 minutes.

Season your burger patty with salt and pepper, then cook to your liking on a hot cast iron skillet. Top with cheese and cover for a couple of minutes to help cheese melt. Put a healthy dollop of dressing on the toasted bread, then top with the burger patty that now has melty cheese. Strew onions over top and finish with your second slice of bread.
Patty Melt Sandwich
Do I need to tell you that I think this is a great book for any food-lover to add to their library? Well, just in case...This is a great book for any food-lover to add to their library! Oh, and can I just throw in the fact that I'm pretty sure each and every single sandwich has a photo to go along with it? Oh. Yes. (And they were taken by Matt Armendariz of Matt Bites.)

I received a copy of this book from the publisher (Quirk Books), to review, should I choose. All opinions stated in this post are 100% mine.
Saturday, April 2, 2011

cookbook review: Maida Heatter's Cookies ...and Whole Wheat Cinnamon-Nutmeg Cookies

If you can't find a cookie or ten that beckon cunningly from the pages of Maida Heatter's Cookies, you're not truly alive.  Seriously, it takes only a flip of a page for the far-off scent of sugar and spice to appear in the air.  It all begins with Cookie Basics, or years of experience and expertise on Ingredients, Equipment, and Techniques laid out beautifully on the pages.  Once you've read through that crash course, you can begin your long, mouthwatering journey through 306 pages of Drop Cookies (and actually chocolate drop cookies actually have a chapter all to themselves), Bar Cookies, Icebox Cookies, Rolled Cookies, Hand-Formed Cookies, More Cookies, and even Crackers and Extras.  Metric Conversions and Equivalents are tucked in the back of the book in case you need them, as well.  So do you believe me now when I say if your heart is beatin', there's no way you'll be able to flip through this book without find at least one cookie calling your name?  While I've marked many varieties to try out, I decided to start with something that I already had everything for in my pantry. 
Whole Wheat Cinnamon-Nutmeg Cookies
ever-so-slightly adapted from Maida Heatter's Cookies
yield: 3 dozen

2 c. unsifted whole wheat flour
1 tsp. baking powder
scant ½ tsp. salt
1 tsp. baking soda
1 tsp. cinnamon
½ tsp. nutmeg
4 oz. unsalted butter, room temp.
1 tsp. vanilla extract
1 c. dark or light brown sugar, packed
1 egg, room temp.
2 Tbs.milk
finely grated rind of 1 large lemon

topping:
1 Tbs. granulated sugar
1/2 tsp. cinnamon

Preheat oven to 375 F.  Line cookie sheet with foil (shiny side up), parchment, or a silpat.  Strain flour, baking powder, salt, baking soda, cinnamon, and nutmeg through a sieve set over a large bowl.  Be sure to put the large flakes left in the strainer back into the bowl with the rest of the ingredients and stir it in.  Set bowl aside.

In large bowl, cream butter with an electric mixer.  Add vanilla, then sugar and beat to mix.  Beat in egg, milk, and lemon rind.  On low speed, gradually add the dry ingredients and beat until just combined.

Lightly flour a large work surface.  Turn dough out, knead slightly, form into a ball, and cut in half.  Work with one half at a time.  Roll into long, thin rope, about 18" long by 1" in diameter.  Cut into eighteen 1" lengths.  Repeat with other half of dough.
Roll each piece into a ball and place on lined sheet (or do in more batches, as necessary...I baked one tray at a time w/ 12 cookies on a sheet).  Press cookies w/ the tines of a fork, forming ridges in one direction.  

Mix together cinnamon and sugar and sprinkle generously over the tops of the cookies.

Bake for 8-10 minutes or until cookies are lightly colored and semi-firm when pressed gently with your fingertip.  Do not over bake.  Transfer to wire rack to cool.


Don't let the simple beauty of these cookies mislead you.  They are utterly fabulous!  The texture is, in my opinion, perfect.  Firm and chewy and laced with spice.  I am a big fan of spice cookies to start with...but the lemon rind adds an unexpected perfume to each bite.  They are kid-approved, as well...Sweet Thang probably ate the most out of all of us...but I came a close second.  Warm, dunked in milk- get. out.

Since I have an endless supply of cookie recipes that I have bookmarked for future use, everybody in this house is smiling from ear to ear.

So, if you ever have a need, an urge, a craving, an event, a potluck, a gathering that requires cookies...I think you should get your hands on a copy of Maida Heatter's Cookies.  The only drawback is that there are no photos in the book...but honestly, I barely noticed.


*I received a free copy of this cookbook to review, should I choose. All opinions stated in this post are 100% mine.

I am sharing this post with:
foodiesreadingchallenge

Friday, April 1, 2011

Honey Buns (just like storebought, only better)

Honey Buns
You know those Honey Buns that you can find in vending machines? I'm about to admit that I've never really liked them. I know, I know. So many people are die-hards - they love them with their coffee, or when they feel a junk food urge. I've always found them to be too sweet and too "stiff" (I like my buns soft, apparently). But I like the idea of them.

Fast forward to finding a recipe for cinnamon rolls from Judith Fertig that featured a honeyed dough and an apple cider glaze. I didn't think twice about trying them (cinnamon roll connoisseur here, in case you didn't know).

They're big. Like, really big. And do you know what the funny thing is? They are almost a Honey Bun replica - only exactly how I would want a Honey Bun to be...soft and irresistible. So, step away from the vending machine (or the snack aisle), and step into the kitchen. You won't be disappointed.